Using Layouts In Qooxdoo - Part 3: HBox Layout
This is the third part of a tutorial series about layout managers, container objects and object hierarchies in Qooxdoo. Read the first part here.
qx.ui.layout.HBox layout manager is similar to VBox but it places its children side by side.
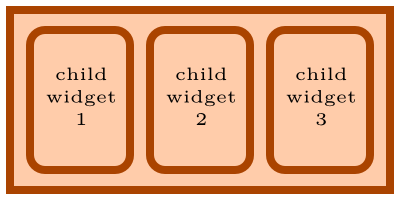
HBox Layout
Let us begin with a simple application:
/*
#asset(hbox/*)
*/
qx.Class.define("hbox.Application",
{
    extend: qx.application.Standalone,
    members: {
        main: function(){
            this.base(arguments);

            var main_container = new qx.ui.container.Composite();

            var layout_manager = new qx.ui.layout.HBox();
            main_container.setLayout(layout_manager);

            main_container.add(new qx.ui.form.Button("Child Widget 1"));
            main_container.add(new qx.ui.form.Button("Child Widget 2"));
            main_container.add(new qx.ui.form.Button("Child Widget 3"));

            var application_root = this.getRoot();
            application_root.add(main_container);
        }
    }
});
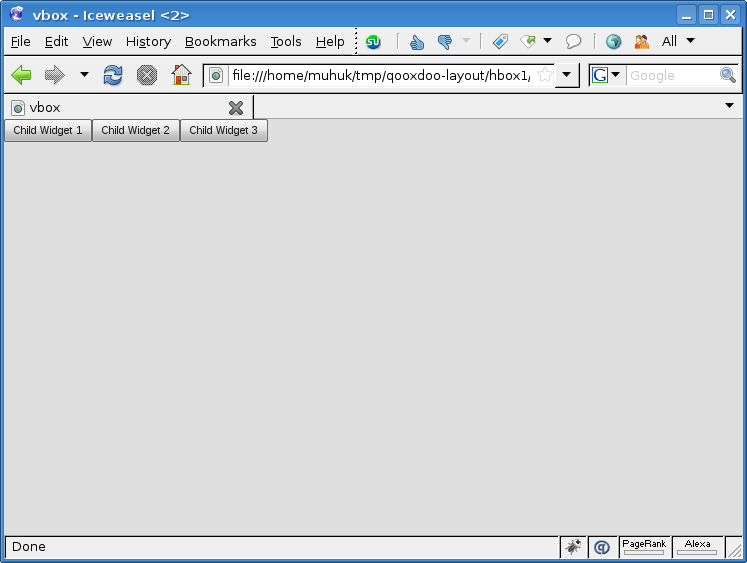
HBox Example 1
Ok, nothing special here. In the next example we will see how we can apply different constraints to individual child elements:
/*
#asset(hbox/*)
*/
qx.Class.define("hbox.Application",
{
    extend: qx.application.Standalone,
    members: {
        main: function(){
            this.base(arguments);

            var main_container = new qx.ui.container.Composite();

            var layout_manager = new qx.ui.layout.HBox();
            main_container.setLayout(layout_manager);

            main_container.add(new qx.ui.form.Button(
                                           "Child Widget 1").set({width:300}));
            main_container.add(new qx.ui.form.Button("Child Widget 2"));
            main_container.add(new qx.ui.form.Button(
                                            "Child Widget 3").set({width:75}));
            main_container.add(new qx.ui.form.Button(
                                "Child Widget 4 has a slightly longer title"));

            var application_root = this.getRoot();
            application_root.add(main_container);
        }
    }
});
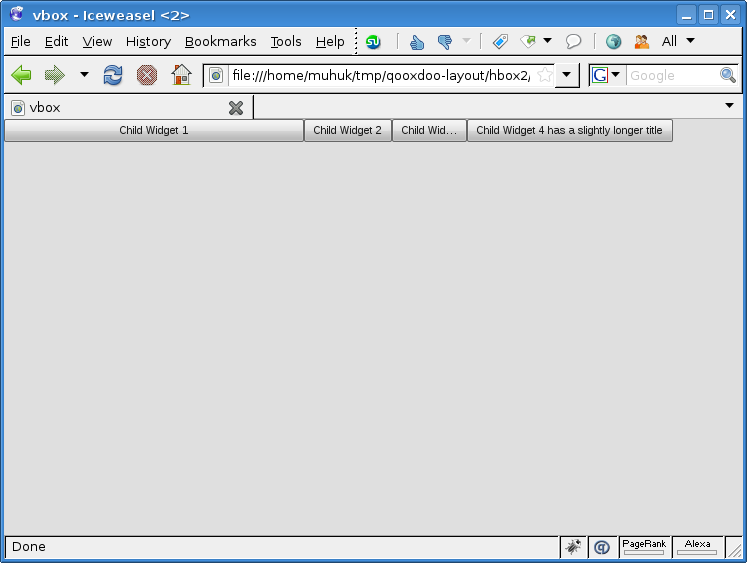
HBox Example 2
We have set some properties on child widgets here. I know, it’s a bit ugly doing it on the same line with the addition. But screen space is more expensive now on the intertubes since the economic crisis1. The important point here is we have set width of first and third widgets explicitly. Second and fourth will be automatically sized. Also notice that the fourth widget is wider. Buttons consider length of their labels when calculating their sizes.
The container will also be auto-sized on creation. But it won’t fill the viewport since we haven’t coded this behaviour (see previous part). Next example will include this behaviour:
/*
#asset(hbox/*)
*/
qx.Class.define("hbox.Application",
{
    extend: qx.application.Standalone,
    members: {
        main: function(){
            this.base(arguments);

            var main_container = new qx.ui.container.Composite();

            var layout_manager = new qx.ui.layout.HBox();
            main_container.setLayout(layout_manager);

            main_container.add(new qx.ui.form.Button("Child Widget 1").set({
                width: 300,
                allowGrowX: true,
            }), {flex: 1});
            main_container.add(new qx.ui.form.Button("Child Widget 2").set({
                minWidth: 75,
                maxWidth: 200,
            }), {flex: 1});
            main_container.add(new qx.ui.form.Button("Child Widget 3").set({
                width: 75,
                allowGrowX: false,
            }), {flex: 1});

            var application_root = this.getRoot();
            application_root.add(main_container);

            application_root.addListener("resize", function(e) {
                main_container.set({
                    "width": qx.bom.Viewport.getWidth(),
                });
            }, this);
        }
    }
});
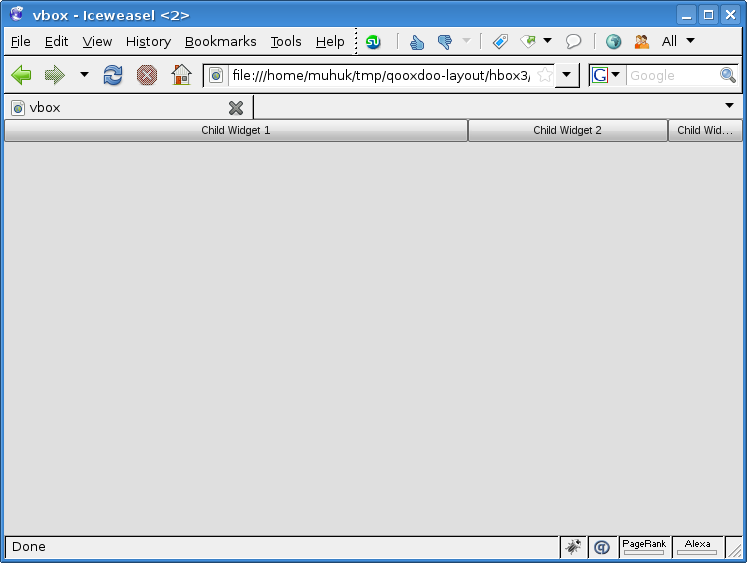
HBox Example 3
We have quite a few changes this time. First of all each widget is set to flex. First and third widgets have their (different) widths explicitly set. Growing is enabled for the first two and disabled for the third. For the second widget we have created different constraints; we have set the maximum and minimum values for width.
Try resizing the window to see how each widget reacts. We should note that the second widget never goes beyond its limits. While the other two conform to fit the containers space. MinWidth and MaxWidth are stronger constraints than width.
Let’s try constraining the container’s size:
/*
#asset(hbox/ *)
*/
qx.Class.define("hbox.Application",
{
    extend: qx.application.Standalone,
    members: {
        main: function(){
            this.base(arguments);

            var main_container = new qx.ui.container.Composite();

            var layout_manager = new qx.ui.layout.HBox();
            main_container.setLayout(layout_manager);
            main_container.set({
                maxWidth: 900,
                minWidth: 400,
            });

            main_container.add(new qx.ui.form.Button("Child Widget 1").set({
                width: 300,
                allowGrowX: true,
            }), {flex: 1});
            main_container.add(new qx.ui.form.Button("Child Widget 2").set({
                minWidth: 75,
                maxWidth: 200,
            }), {flex: 1});
            main_container.add(new qx.ui.form.Button("Child Widget 3").set({
                width: 75,
                allowGrowX: false,
            }), {flex: 1});

            var application_root = this.getRoot();
            application_root.add(main_container);

            application_root.addListener("resize", function(e) {
                main_container.set({
                    "width": qx.bom.Viewport.getWidth(),
                });
            }, this);
        }
    }
});
We have set the maximum and minimum width for the container widget. If you resize the window you should notice the container obeying these constraints.
VBox & HBox Wrap-up
VBox and HBox are simple layout managers. I have mostly tried to illustrate how container preferences, layout preferences and child widget preferences work together with examples. In the next chapters we’ll work on more advanced layout managers and then composite layouts with multiple containers.
NEXT PART: Grid Layout
1: This is a lame joke, I’ve just done that for the sake of brevity.
2: This is redundant. Grow and Shrink properties are true by default.
If you have any questions, suggestions or corrections feel free to drop me a line.