Using Layouts In Qooxdoo - Part 4: Grid Layout
This is the fourth part of a tutorial series about layout managers, container objects and object hierarchies in Qooxdoo. Read the first part here.
qx.ui.layout.Grid is like a combined VBox & Hbox. Grid supports:
- Variable width/height columns/rows.
- Cells spanning multiple columns/rows.
- Empty cells.

Grid Layout
Here is a simple application using a Grid layout:
/*
#asset(grid/*)
*/
qx.Class.define("grid.Application",
{
    extend: qx.application.Standalone,
    members: {
        main: function(){
            this.base(arguments);

            var main_container = new qx.ui.container.Composite();

            var layout_manager = new qx.ui.layout.Grid();
            main_container.setLayout(layout_manager);

            main_container.add(new qx.ui.form.Button("Child Widget 1"), {row: 0, column: 0});
            main_container.add(new qx.ui.form.Button("Child Widget 2"), {row: 0, column: 1});
            main_container.add(new qx.ui.form.Button("Child Widget 3"), {row: 0, column: 2});
            main_container.add(new qx.ui.form.Button("Child Widget 4"), {row: 1, column: 0});
            main_container.add(new qx.ui.form.Button("Child Widget 5"), {row: 1, column: 1});
            main_container.add(new qx.ui.form.Button("Child Widget 6"), {row: 1, column: 2});

            var application_root = this.getRoot();
            application_root.add(main_container);
        }
    }
});
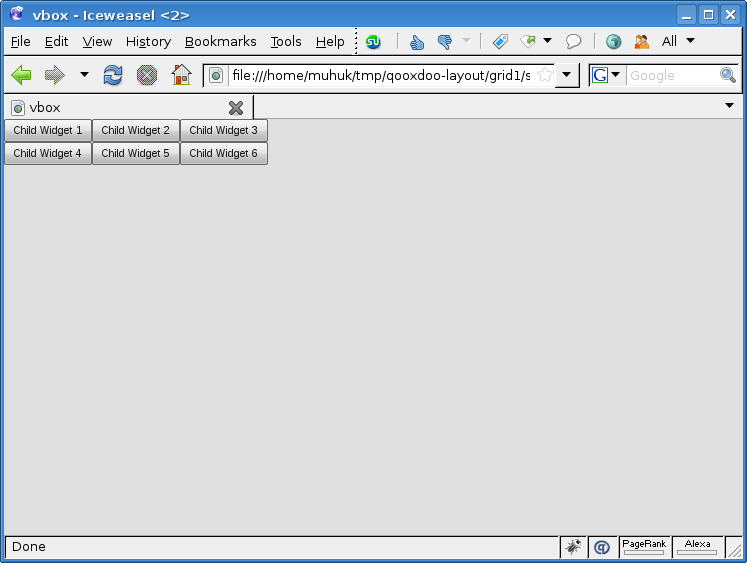
Grid Example 1
We have created an 3x2 table layout without explicitly stating row/column count. Just set your row and column layout preferences when you add your child widgets.
Try commenting out some cells to see what happens. If you, for example, comment out second (0,1) and fifth (1,1) cells the second column disappears. But missing cells are OK otherwise. You can see below the layout when third and fifth cells are commented:

Grid Example 1 - Missing Cells
Following example illustrates row/column spanning:
/*
#asset(grid/ *)
*/
qx.Class.define("grid.Application",
{
    extend: qx.application.Standalone,
    members: {
        main: function(){
            this.base(arguments);

            var main_container = new qx.ui.container.Composite();

            var layout_manager = new qx.ui.layout.Grid();
            main_container.setLayout(layout_manager);

            main_container.add(new qx.ui.form.Button("Child Widget 1"), {
                row: 0,
                column: 0,
                rowSpan: 2
            });
            main_container.add(new qx.ui.form.Button("Child Widget 2"), {
                row: 0,
                column: 1,
                colSpan: 2
            });
            main_container.add(new qx.ui.form.Button("Child Widget 3"), {
                row: 1,
                column: 1
            });
            main_container.add(new qx.ui.form.Button("Child Widget 4"), {
                row: 1,
                column: 2
            });

            var application_root = this.getRoot();
            application_root.add(main_container);
        }
    }
});
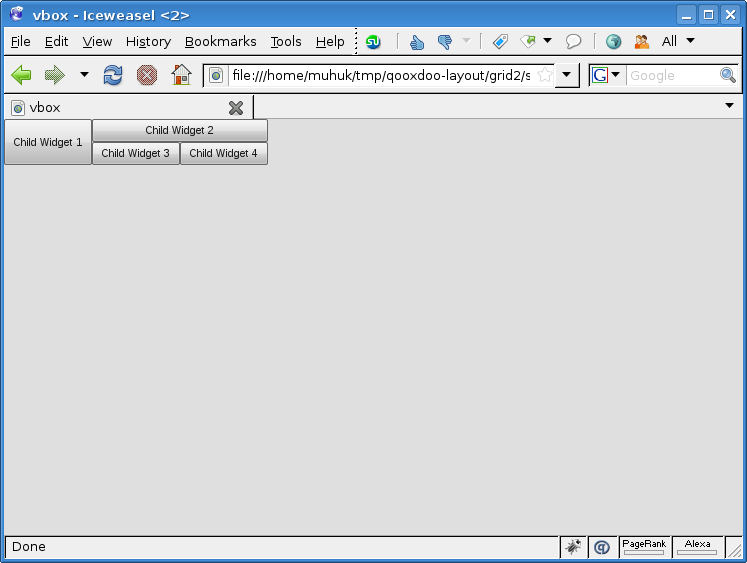
Grid Example 2
Spanning is easy, just like HTML tables. But we set placement (row and column parameters) explicitly. We can add our widgets in any order and still get the same layout if we use the same preferences.
As I said in the beginning of this part Grid is like a combination of VBox and HBox. Therefore flexing is two dimensional:
/*
#asset(grid/ *)
*/
qx.Class.define("grid.Application",
{
    extend: qx.application.Standalone,
    members: {
        main: function(){
            this.base(arguments);

            var main_container = new qx.ui.container.Composite();

            var layout_manager = new qx.ui.layout.Grid();
            layout_manager.setRowFlex(0, 1);
            layout_manager.setRowFlex(1, 1);
            layout_manager.setColumnFlex(0, 1);
            layout_manager.setColumnFlex(2, 1);
            main_container.setLayout(layout_manager);

            main_container.add(new qx.ui.form.Button("Child Widget 1"), {
                row: 0,
                column: 0,
                rowSpan: 2
            });
            main_container.add(new qx.ui.form.Button("Child Widget 2"), {
                row: 0,
                column: 1,
                colSpan: 2
            });
            main_container.add(new qx.ui.form.Button("Child Widget 3"), {
                row: 1,
                column: 1
            });
            main_container.add(new qx.ui.form.Button("Child Widget 4"), {
                row: 1,
                column: 2
            });

            var application_root = this.getRoot();
            application_root.add(main_container);

            application_root.addListener("resize", function(e) {
                main_container.set({
                    "width": qx.bom.Viewport.getWidth(),
                    "height": qx.bom.Viewport.getHeight(),
                });
            }, this);
        }
    }
});

Grid Example 3
We have set rowFlex (vertical) and columnFlex (horizontal) for specific rows/columns on the layout manager itself. Try resizing the window to see how cells react. Note that second column (column index 1) doesn’t flex horizontally.
If you have any questions, suggestions or corrections feel free to drop me a line.